Advanced Denormalization Options for Cassandra
You can select table and column subsets for denormalizing Cassandra database after deriving a model. Using the Advanced denormalization option, you can merge the source tables and columns with the target based on the requirement.
The denormalization options for Cassandra appear only when the Advanced Denormalization option is selected while deriving a model. Once the model is derived, the Denormalization Wizard for Cassandra model appears and has different sections. By default, Table section is displayed.
To denormalize the model further, follow these steps:
-
On the Tables section, click the Target drop-down to select a target table. All the tables will be merged into the target table.

Select Auto Denormalization option to merge tables with the target automatically. This embeds the tables in the model with one-one relationships as User Defined Type and one-to-many relationships as normal columns.
-
Under Available Tables, select the that you want to merge. Then, click
 .
.
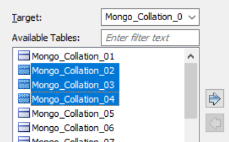
This moves the selected tables under Selected Tables.

-
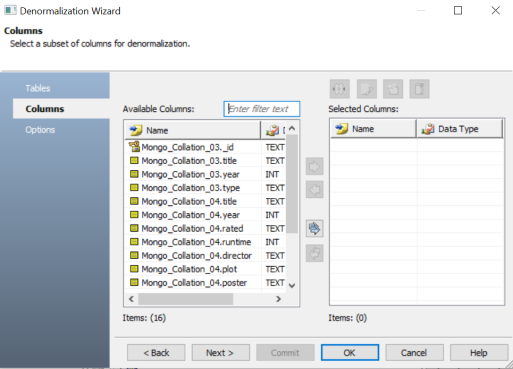
Click Next.
The Column section appears. It displays a list of available columns.
-
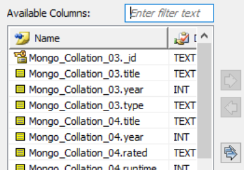
Under Available Columns, select the that you want to merge. Then, click
.
This moves the selected databases under Selected Columns.
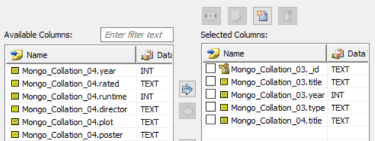
Once you have added the selected columns, you can use any of the following:
- New (
 )
) -
Use this option to add a new column under Selected Columns.
- Update (
 )
) -
Use this option to edit column details such as column name, domain parent, and data type for a selected column.
- Merge (
 )
) -
Use this option to merge the selected columns and create a new column under Selected Columns.
- Delete (
 )
) -
Use this option to delete to the selected columns.
- New (
-
Click Next.
The Options section appears. -
Select an Embedding Type.
You can select the following embedding options:
-
Embed as Auto: Use this option to embed tables through an auto-mechanism based on one-to-many and one-to-one relationships.
-
Embed as Normal: Use this option to embed collections using normal column styles.
-
Embed as UDT: Use the option to embed collections using a User Defined Type (UDT) styles.
-
-
Select Relationships option to include table relationships to the model.
-
Select Cascading options to determine how multiple collections are merged into a single collection.
Use the following cascading options:-
All: Use this option to denormalize all relationship levels in a collection into a single collection.
-
Levels: Use the option to specifies the number of levels up to which collections are denormalized into one collection. For example, if you set Level to 1, all the collections up to level 1 in the relationship hierarchy will be denormalized into a single collection.
-
Auto Cleanup: Use the option to delete the source collection after denormalization.
Alternatively, click Commit to apply changes to the model without exiting the Denormalization Wizard.
-
-
Click OK.
The denormalization process starts and displays collections based on the denormalization option.
|
Copyright © 2023 Quest Software, Inc. |